America to Japan Crossing - The Trimaran |
| Ama - Step 5 |
| Building an Ama (Strip Planking) |
| 1) |
Cut almost a full 4x8' sheet of 1/2" plywood into 1.5", 2" 2.5", 3", 3.5" 4.5" 6", 7.5" and 9" strips wide and about 12" long. After that we routed the cove and bead into the strips. |
 |
| 2) |
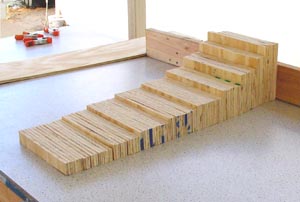
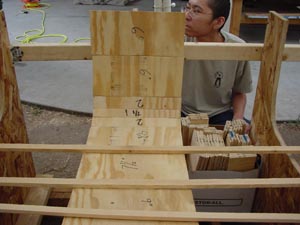
We then laid the sizers into the mold and figured out what sizes we should use. This was a great idea that we got from Andre Bilodeau's Book "Building Your Hull with The Bead & Cove Foam System Using CoreCell Foam". He sead to use them as you work and cut the strips, but we used them to make a cut map for the foam. Here is Miki working out the strips on our main station (Station #12). We did it over and over until we were happy with the gaps and the number of strips that will be used. |
 |
| |
From this we were able to figure out the key strip (A strip that will be coved on both sides allowing the cove to always be on the up hill side of the part your working). In this case our key strip will be a 4 1/2". |
 |
| |
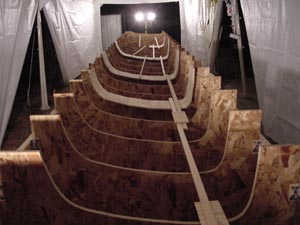
We sized about every other station. This helped us to see what strips needed to get resized as we went. One other thing we found to be useful is a 1/2" batten with a cove and bead cut into it, this allowed us to set our Key strip on every station. I spent a few hours in Visio making the cut map, while running outside at 1:30am to verify the numbers we had written down earlier in the day. |
 |
| 3) |
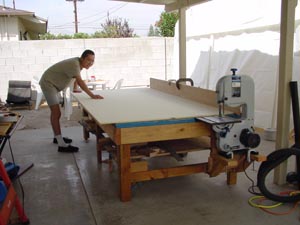
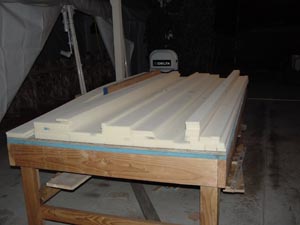
After building the cut map Miki and I set out to cut the foam into the 8' basic lengths at all the different widths called out in the cut map. |
 |
| |
After a few hours of cutting the strips on the band saw, we had all the strips the were called out. Total foam usage is about 5% more then was in the budget, this added to the other 20% what is lost to the cove and bead. The foam budget is now calling for a load more foam than we thought was going to be needed. The original 10% loss was erroneous, and we still have yet to glass a part. |
 |