| English | Japanese |
アメリカから日本へ … 太平洋横断プロジェクト | ||
|---|---|---|
| アーマ - ステップ 4 | ||
| アーマ作成 | ||
| 1) | アーマ用の型紙を切るのはとっても大変だった。グラフィックペーパーを使って Cutting out the templates proved to be a pain. After making 5 with the full sized pattern and graphite paper I decided to work smarter. We employed the help of Bertha, our barrowed 38 inch plotter. Bertha came to me without any information, drivers, pens, pen holders, and cables. I contacted Kurt and had him send me the files in dxf format (cad standard). I went and downloaded gCad and started in learning that. I contacted the maker of Bretha, ioLine, and they were very helpful. Then I made the cable from parts that were in the server room. Bertha talks a dead language called DM-PL, it was last used for CNC systems in the 80's. Ioline was able to provide a HP/GL converter to DM-PL. Then downloaded CamExpert a cad/cam system for linux and windows that can export HP/GL based files close to the one needed by the converter. After running a test without a pen or holder Miki approved the funds needed to get the pen and pen holder. |  |
| Once all the parts showed up, it was fast to get Bertha to draw all the full size templates in a few hour. Then with my trusty exacto blade and my remote control, I sat and cutout all the templates while watching late night cable programming. | ||
| With the pressure from Brad to test his birthday present. Kodiak and I cut all the 4x8s down to 4'x35 1/2 inches. This picture really explains the help Kody would provide until the saw was turned on. | 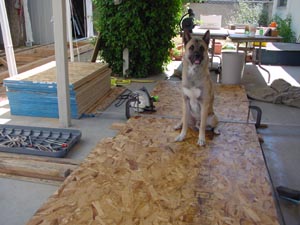 | |
| Brad got his time to play, he cuts like a madman and gave me very little work to do fairing the edges. After a centerline was added to the board, in this case 25 1/2 inches from the working edge, the template was traced on and cut. Then it was faired and setup to see the real size of the Ama. | 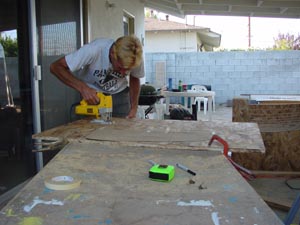 | |
| After a long day in the boat yard Kodiak and I check to make sure all the lines are fair. | 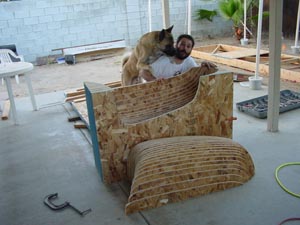 |
|
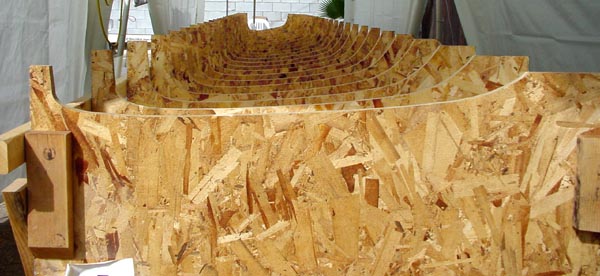
| Looking down the frames. |  | |
| Everyone is asking how big these boys will be. Here is a look at the Ama from the side with two stations. Notice the nice acorn shape. Now just think that filled with 1/2" foam and glassed inside and out. | 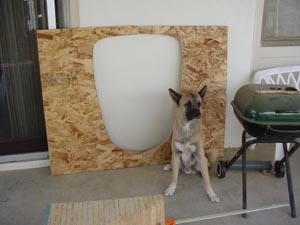 | |
| Mounting the frames to the strongback. | Picture Coming Soon | |
| Leveling the frames | 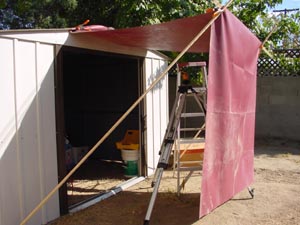 | |
| Leveling the frames | 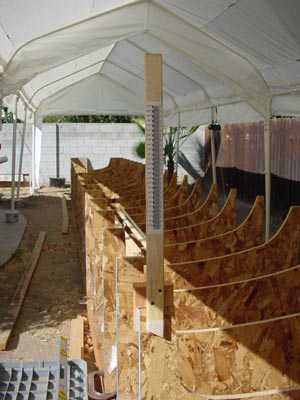 | |
| Securing frames to the stations. | 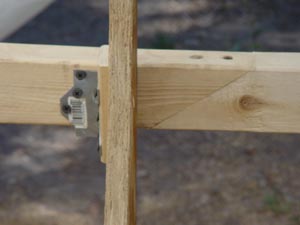 | |
 | ||
| The foam is HERE! After an around the country trip for the foam, it is here. A spacial thanks goes out to Rick, Pat and all the poeple at Composites One for the help in this project. WE CAN NOW START BUILDING A BOAT !!!! Now to start cutting the foam into strips of different widths, the size range we will use is from 1.5" to 12" wide. Then these strips will get a cove and bead routered into them. NOTE TO BUILDERS: when budgeting your project allow for 20% waste in this section. And yes, that is hair growing back on Miki's head. |
 | |
| Ok, so it takes more then foam to build a trimaran. It also takes epoxy and glass, as our 9oz unidirectional is now sitting off the coast of Los Angeles waiting to get unloaded and shipped to Texas to get made into 9oz uni and then shipped back to LA. We will work on bulkheads and other flat items that use triaxial glass. NOTE: taking the family photo doesn't always go the way we want (outtake). We also got the picture of Kodiak that people have been asking for, Kody sleeping. We will keep an eye out for a chance to get him with his nose on his back and put the picture here. |
 | |
| フライングスクォーレルの建築 | |||||
| ステップ 1 | ステップ 2 | ステップ 3 | ステップ 4 | ステップ 5 | ステップ 6 |
| 太平洋横断プロジェクト - ホーム | |||||